This guide will walk you through the steps of port forwarding on a Trend Net TEW-432BRP
Step 1: Open up your favorite browser and go to the router’s default gateway address.
- http://192.168.10.1 (Default Address)
- Default Username: admin
- Default Password: admin or (blank)
Step 2: Click on Access and then Virtual Server.
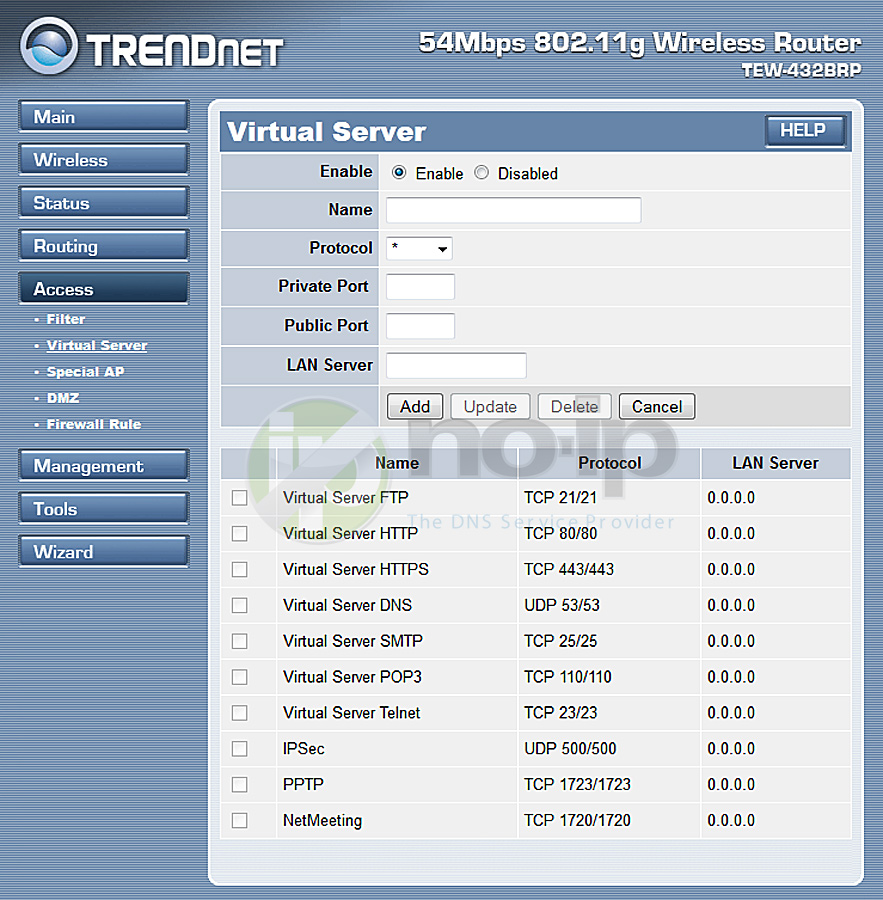
trendnet 432brp router port forwarding screenshot
Step 3: On this page you will need to enter in the below settings.
- Select Enable.
- Enter a name or description (eg, webcam, RDP, etc.).
- Protocol, select TCP or BOTH.
- Private Port is the LAN side port on your home network.
- Public Port is the Internet (WAN) side of your home network.
- LAN Server is the internal IP address of the machine/computer/camera that you want to direct connections to. This is typically a 192.168.10.x address.
Click add and save the settings. You should now be able to test your port at www.portchecktool.com. Please keep in mind your ISP (Internet Service Provider) can be blocking certain ports such as port 80, 25 and 21. You can call and ask if they are. If you are still not able to see the ports, check the firewall and anti-virus software on your computer.
Example
You have a webcam that has the IP address 192.168.1.100 and it runs on port 80. You want to be able to access this camera from outside your network on port 8080. You would enter the below values into port forwarding page.
- External Port = 8080
- Internal Port = 80
- Protocol = Both
- To IP Address = 192.168.1.100
- Enabled = checked
Then to view the camera you would use your No-IP host of “somehost.no-ip.com” like this: http://somehost.no-ip.com:8080 to reach the webcam.