Follow the guide below to set up POP/IMAP email on an Android device.
Step 1: Go to “Apps“.
Step 2: Go to “Email”.
Step 3: Click on the “Menu” button.
Step 4: Go to “Settings“.
Step 5: Click on “+“.
Step 6: Enter your full email address and password for the email account. The description field can be filled in as you see fit.

Step 7: After hitting “next” you will select the desired protocol.

Step 8: Enter in our mail server information. For POP/IMAP server enter mail.noip.com and for username enter your full email address. Example “you@youremailaddress.com”. If the password field is not filled in, re-enter it again. Select Port 143 for inbound IMAP port. Select Port 146 for inbound POP.

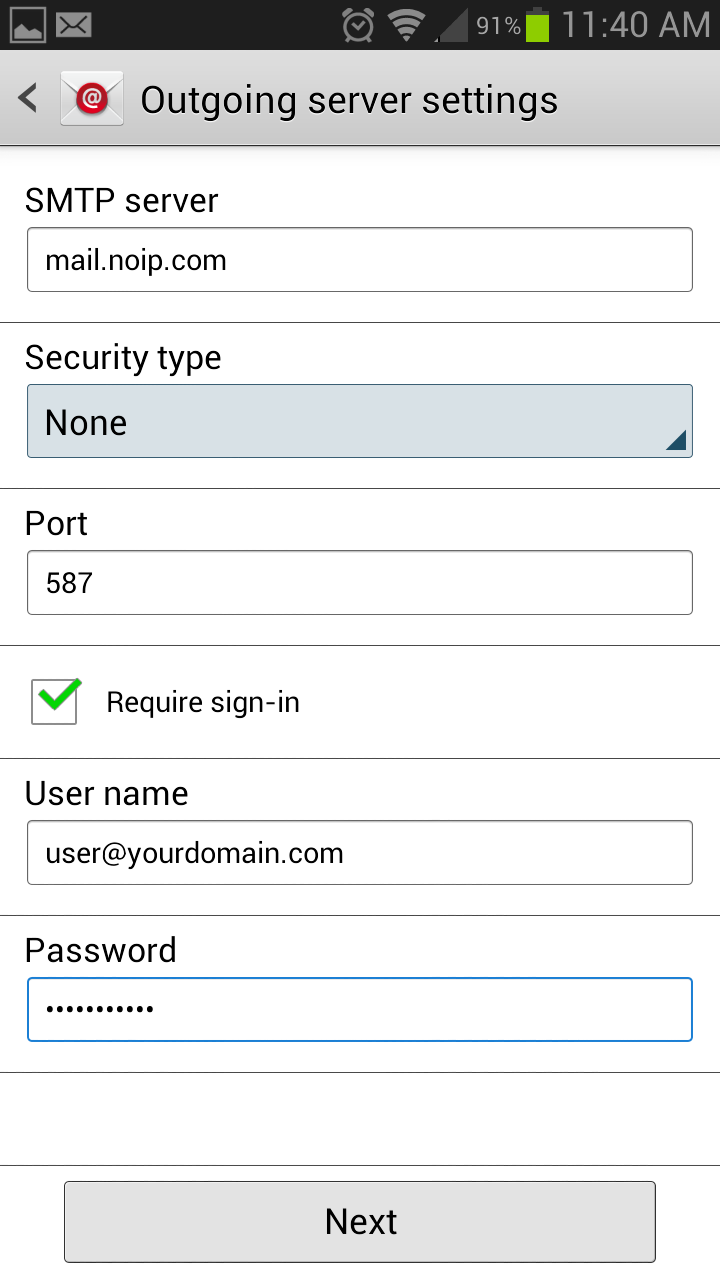
Step 9: Enter in our mail server information. For the host SMTP server enter mail.noip.com and for username enter your full email address. Example “you@youremailaddress.com”. If the password field is not filled in, re-enter it again. Select Port 587 or 465 with SSL for outbound server.
Step 10: Proceed to the following steps on screen.