You just got your new camera system or VNC installed and want to use No-IP to create an easy hostname to remember. You have registered with No-IP, created a hostname, added the IP address and go to use the hostname, but cannot connect or find the server. So what do you do now?
Note: The pictures in this guide are from model TL-R860 Firmware 3.3.0 Build D51109. The instructions in this guide can be used with other TP-Link routers and firmware, although slight differences may be present. You can also find more up to date instructions directly from TP-Link.
Everything is setup correctly within No-IP, so why is it not working?
Port forwarding is probably the missing link to the process. This guide will explain how to forward ports on a TP-Link router.
To login to your router, open your browser and type in your router’s internal IP. The default IP address for TP-Link is 192.168.1.1 You will be prompted for a username and password. If this is your first time logging in to the router, the default username and password is admin. (You should change these upon login to keep your network secure.)
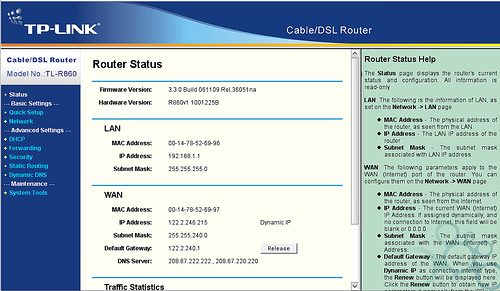
Once logged in, you will see a screen similar to this:

From the left hand navigation, click the following:
Forwarding > Virtual Servers > Add New
Now you are able to add the port that you wish to open. For some DVRs it is just one port, though certain ones require more ports to be open.
Example: If you wish to open port 1720. Type 1720 into the Service Port field. Enter in the Internal IP that you wish to be open on 1720 (this would be the IP address of your DVR or device). If you are unsure what the Internal IP address is, you can go back to the home page and see the default name and Internal IP addresses of the devices that are currently connected to your network.
Once you know the IP address of the device, enter it into the “IP Address” field. Now, set “Protocols” to “All” and set “Status” to “Enabled”.
Click the “Save” button and you have now successfully port forwarded that port! If you have multiple ports to forward repeat the process until completed.

Open a browser and go to 192.168.1.1 > Login > Forwarding > Virtual Servers > Add New > Service Port (IP you wish to forward) > IP Address (Which device you wish to open) > Protocols All > Status Enable.
NOTE: If you open port 80 on your router, you will now have to login to the admin settings of the router using the following IP address: http://192.168.1.1:8080