How to Flush Your Windows DNS Cache
The following guide will teach you how to flush or “reload” your Windows DNS Cache. Flushing the cache removes all the information stored there, forcing the computer to find new DNS information.
A Quick Note on DNS Cache Terminology
Officially, the task that you’re about to start is known as “flushing your DNS cache.” People may refer to “reloading” or “resetting” their DNS cache instead. This is just another name for the same process.
Step 1: Find the “Windows Command” Tool
The first step to flushing your DNS is to open your “Windows Command” prompt.
If you’re running Vista, Window 7, Windows 8, Windows 10 or Windows 11: Click “Start” and type the word “Command” in the Start search field.
Step 2: “Run as Administrator”
Right-click the command prompt icon and select the option to “Run as Administrator”.
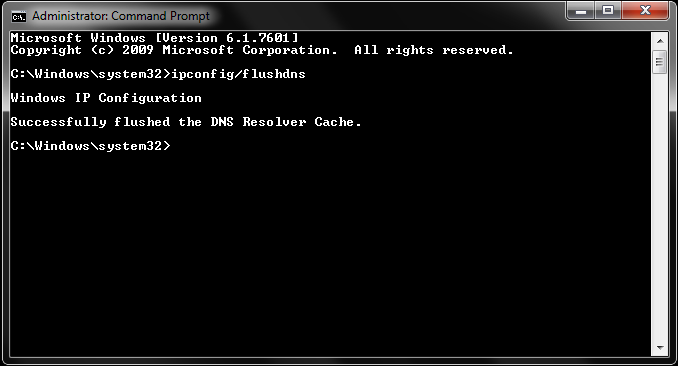
Step 3: Flush the DNS
In the open prompt, type “ipconfig /flushdns” (without the quotes). You should receive a message of your success as confirmation when the cache is cleared.
Video DNS Flushing Instructions
This video will show you how to flush your DNS cache on Windows:
Follow this link if you need instructions on how to flush your DNS cache on a Mac.