What is the DDNS option on a Dahua Device?
The Dynamic DNS (DDNS) option on your Dahua devices means linking a static hostname at No‑IP to your changing public IP address. Once enabled, the router automatically updates the hostname whenever your IP changes, making remote access to your home network seamless and avoiding the need for manual IP updates.
Summary
- Log into your Dahua device via its local IP and open the network menu.
- Go to the DDNS section, enable DDNS, and select “No‑IP” from the DDNS Type dropdown.
- Enter the server address dynupdate.no‑ip.com, your No‑IP hostname, DDNS Key username, and password.
- Apply the settings and verify the status shows success — your hostname will now map to your dynamic public IP.
This guide will help you setup and configure Dynamic DNS within your Dahua device. Using the integrated Dynamic DNS in your device means that you don’t have to keep your computer running all the time on your network in order to access your device remotely.
Step 1: Log in to the camera using the local IP address.
Step 2: Click “Network.”

Step 3: Click “DDNS” and then click “Enable.”
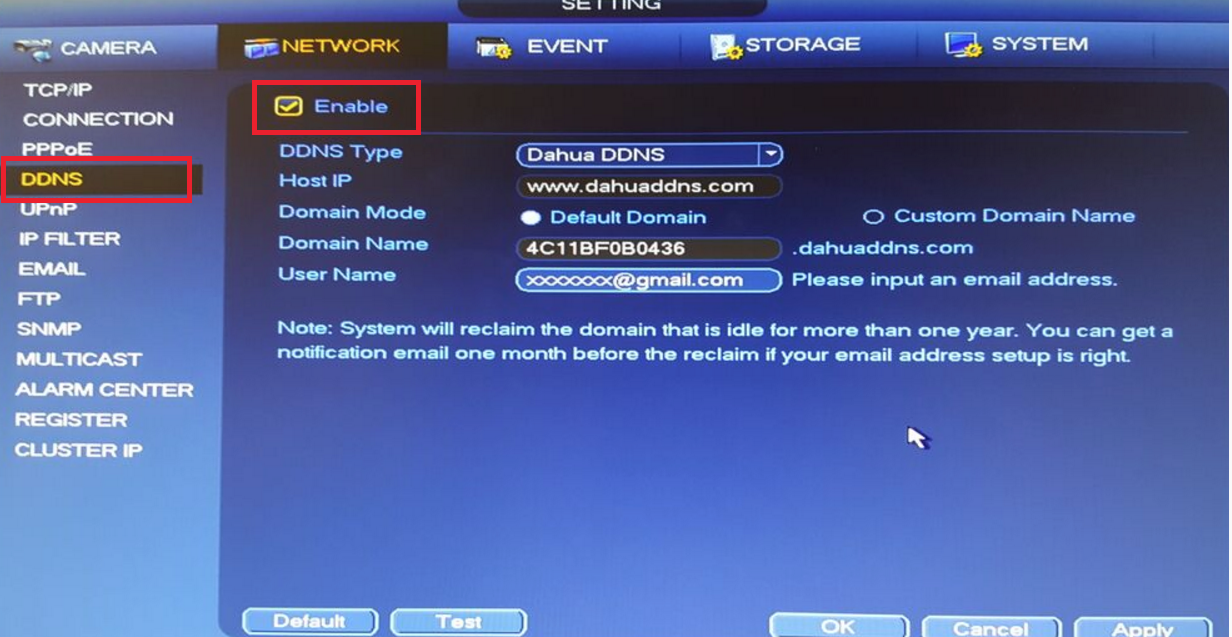
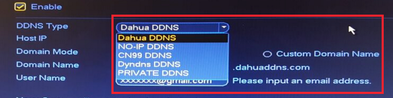
Step 4: Select No-IP from the “DDNS Type” drop down.
Step 5: Input the following information:
- Host IP: If this section does not automatically fill in add the following: dynupdate.no-ip.com
- Domain Mode: Click “Custom Domain Name.”
- Domain Name: all.ddnskey.com
- Username: Your DDNS Key Username or Email address
- Password: Your DDNS Key Password
DDNS Key usernames and passwords are created individually for each hostname or group of hostnames. They are generated from the DNS Records page in your account.
Step 6: Click “Ok” or “Test” at the bottom of the page.
Congratulations, the Dahua device will now send No-IP updates whenever the IP address changes.