Here’s a great video that explains how to configure DDNS in a router:
https://www.youtube.com/watch?v=EH8wJt81bqg
This guide will help you setup and configure Dynamic DNS within your Router. Configuring DDNS in your router means that you don’t have to use our Dynamic Update Client to keep your hostname updated with the correct IP address. Instead, you use the Integrated Dynamic DNS within the device. Not all router manufacturers include No-IP as an Integrated Dynamic DNS provider. If you find that yours does not, drop them a Tweet or Email and ask them to add us.
Please follow these steps to configure your router:
Step 1: Login to your router via the default gateway address.
Step 2: Enter your router credentials into the login page.
Please Note: Your router credentials should be on a sticker on the bottom of your router. If not, you can see the most common credentials below.
Device Username Password
D-Link admin (leave blank)
Netgear admin password
Linksys admin admin
Asus admin admin
DrayTek admin admin
ZyXel admin 1234
TP-Link admin admin
TRENDnet admin admin
Belkin admin (leave blank)
Step 3: Next, locate the Dynamic DNS (DDNS) settings. Typically this will be under Advanced and then DDNS or Dynamic DNS.
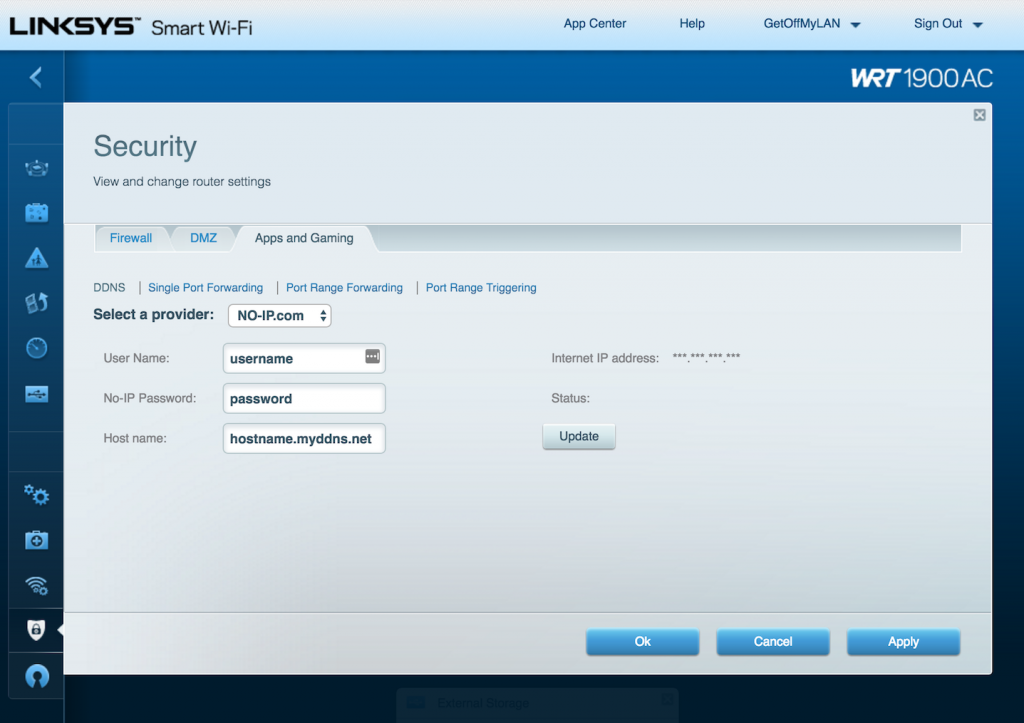
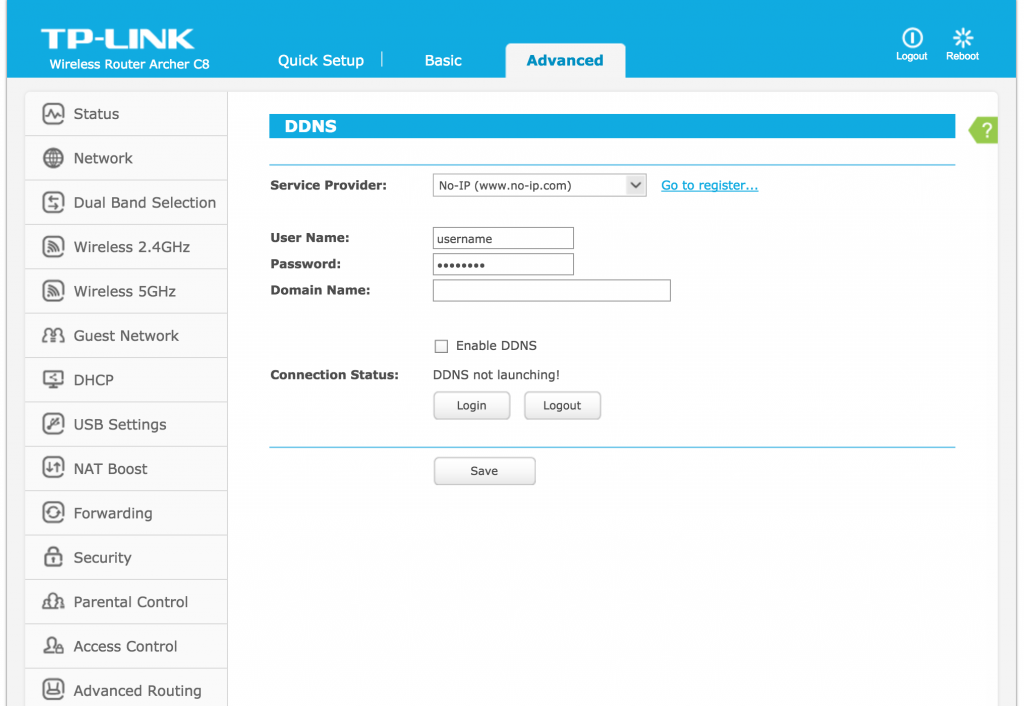
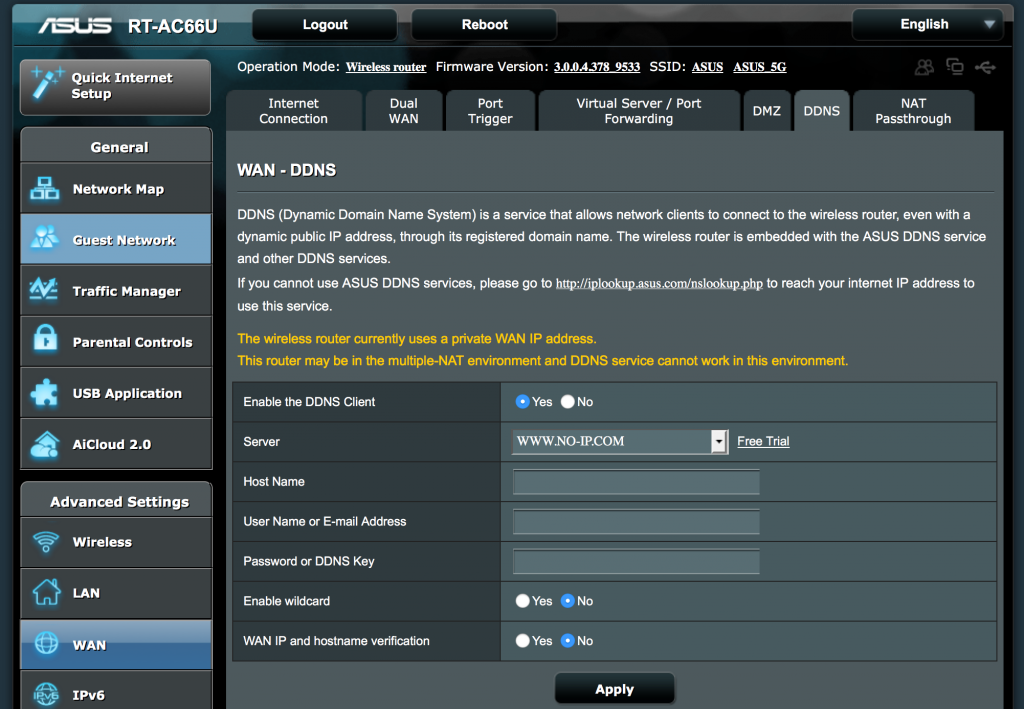
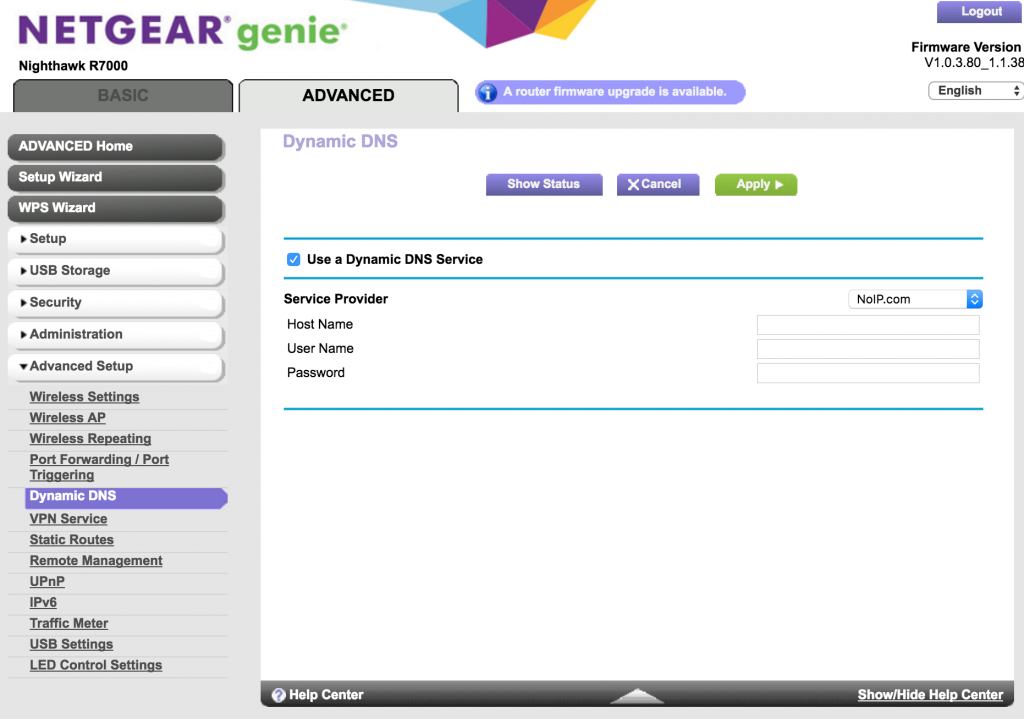
Step 4: On the DDNS page, select No-IP as the service provider. Enter your No-IP username and password. Then enter the hostname or domain you have created in the host or domain field.
Below is an example of what your settings may look like and what needs to be entered:
DDNS/Service Provider: No-IP
Username: Your DDNS Key Username / Email
Password: Your DDNS Key Password
Hostname/Domain: all.ddnskey.com
Server/Server Address: dynupdate.no-ip.com
Not every device will ask you for a server or server address. The service will still work without issue, if the device does not ask for it.
DDNS Key usernames and passwords are created individually for each hostname or group of hostnames. They are generated from the DNS Records page in your account.
Please Note: If your router does not list No-IP, you can try updating your firmware to see if we were added in the latest update. Otherwise, you will need to run our Dynamic Update Client on a computer at the network location. You can also check if another device, such as an NVR/DVR, on your network supports No-IP for DDNS.
Step 5: Finally, check to see if your hostname can successfully receive an update. This can be done by logging into your No-IP.com account and clicking “Dynamic DNS” on the left-hand navigation bar. Select “Modify” next to your hostname and set your hostname IP address to 1.1.1.1 and click “Update Hostname.” Once updated, you will want to restart your router. When the router is back up, log into your No-IP.com account again and navigate back to the “Dynamic DNS” page. You should now see your current public IP address. If you see your current public IP address, your setup was successful and your DDNS is working correctly.
Note: If you do not know your current public IP address you can find it by going to www.portchecktool.com.
Below you will see interfaces from the 4 most popular router manufacturers. Be aware that your router may display a different interface. If you have any questions or are unsure what to do, we recommend finding a guide that provides more information.


