IIS (Internet Information Services) is Microsoft’s web / mail / ftp server. This guide will cover the early versions of IIS that are still highly used today on the older Windows 2000/XP and similar machines.
This guide assumes you already have added or installed IIS on your machine.
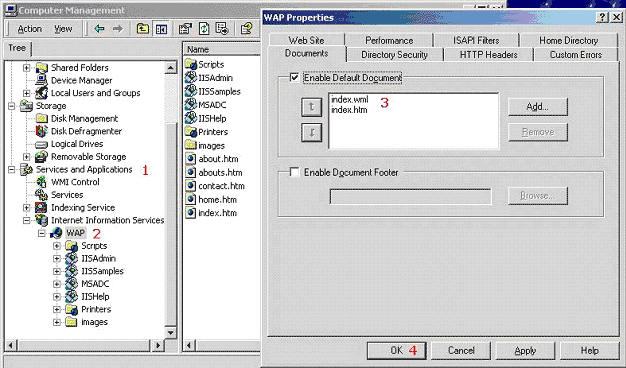
Step 1: Launch the IIS manager. This can normally be done by right clicking on “My Computer” and then selecting “Manage”. IIS is found in Services and Applications (#1 in the image).
Step 2: Setup the Default Web Site. It (#2 in the image) will appear under IIS, and you need to right click on that and go to Properties (In the photo below, mine appears as WAP, but it is just because I have renamed it, as I am about to show you). This is the main section for adjusting the web site options, and it is here you will change anything to do with your site.
Step 3: Type a description of your site in the “Description” box so that you will be able to locate and manage it later.
Step 4: Click on the “Home Directory” tab and specify the directory for where the contents of this site will be. For example, if you have a folder on the “C:” drive called “WEB_ROOT” that contains your index.html and associated files, you would choose this directory. If your site files are located elsewhere else you can specify another directory.
Step 5: Make sure that “Enable Default Document” is checked as shown (#3 in the image).
Step 6: Click “OK” to return to the computer management screen, then select your site and press the “Play/Start” button along the top bar.
Step 7: At this point your computer is now running an IIS web server in the most simplest form. You may test the site by typing “http://localhost/” into your browser. You may also replace localhost with “127.0.0.1″ for the loopback IP address if needed.