If you’re trying to access a device on your network from outside your home or office, port forwarding is required. If you do not port forward your router, you will only be able to access your device on the internal network.
What You’ll Learn in This Article
- What port forwarding does and why it’s required for remote access
- How to log into your Netgear router using the default gateway
- Where and how to configure port forwarding in Genie firmware
- How to test your setup using your hostname and port number
Step-by-step Configuration
Step 1: Login to the Netgear router via the default gateway address.
Step 2: Select “Advanced” and then “Port Forwarding/Port Triggering.”

Step 3: Select “Add Custom Service.”

Step 4: Enter a Device Name, Starting Port, End Port, and IP Address. Select “TCP/UDP” under Protocol.
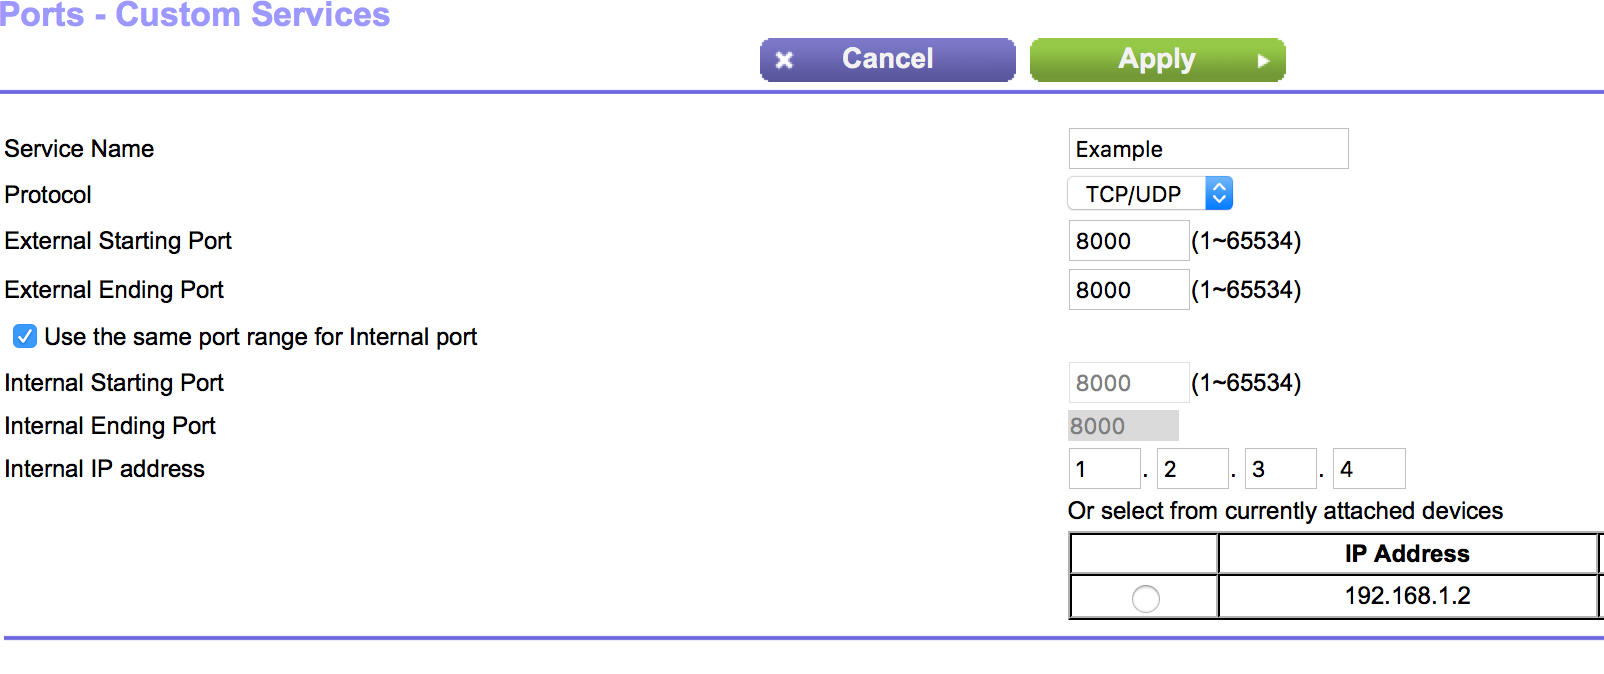
You should now be able to connect to your device via a web browser. Simply enter your hostname followed by the port number into the address bar. For example https://hostname.ddns.net:8000