

Article Summary
- Log in to the TP-Link router via its default gateway address, then click 'Forwarding' > 'Virtual Servers' and 'Add New'.
- Enter the Service Port, Internal Port and IP Address, select 'All' under Protocol and 'Enabled' under Status, then click 'Save'.
- Connect by entering your hostname and port in a browser, for example http://hostname.ddns.net:8000.
- Mobile apps normally specify the port themselves, so you only need to enter your hostname.
What is Port Forwarding on your TP-Link Router?
Port forwarding is a method of routing connections over the internet to a device on a local network. By configuring port forwarding on your TP-Link router, you can enable a variety of services such as remote access to a media server, hosting a game server, or self-hosting a website.Article Summary
- Log into your TP‑Link router using its default gateway address (e.g., 192.168.1.1).
- Navigate to Forwarding → Virtual Servers in the router menu.
- Click Add New, then enter the service port, internal port and the internal IP address of the device.
- Select “All” for Protocol (or individually set TCP/UDP), enable the rule, then click Save.
- After saving, test the connection using your hostname (e.g., http://yourhost.ddns.net:8000).
-
Login to the TP-Link router via the default gateway address.
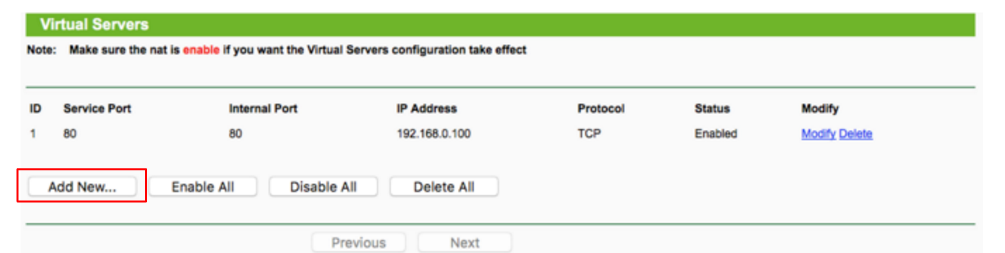
Click on “Forwarding” and then “Virtual Servers.”

Click “Add New.”
Enter the Service Port, Internal Port and IP Address. Then select “All” under Protocol and “Enabled” under Status.
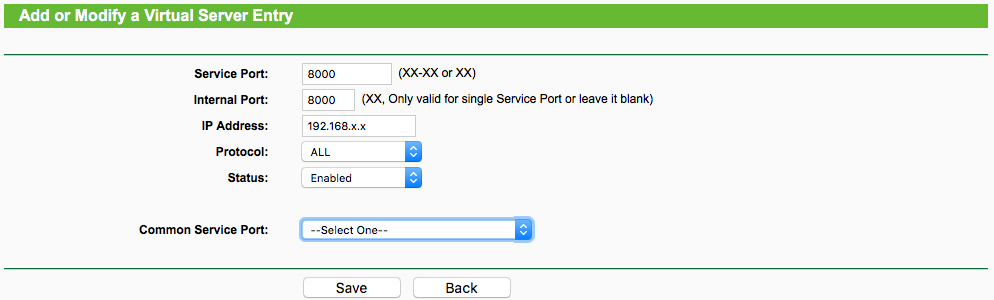
Click “Save.”