This guide will walk you through the process of setting up a Blogger page with a custom domain managed by No-IP.
Start by logging into your Blogger page and going to the settings page of your blog. You can do this by clicking on “Settings” along the left side of the page.
![]()
Under “Publishing” you will see “+ Setup a 3rd party URL for your blog.” Click this link.

It will open a box asking for a hostname (sub-domain), for example, “blog.domain.com” or “www.domain.com” to be entered.
Input your domain name and click “Save”.

You will then be presented with information that needs to be setup properly within your No-IP account.
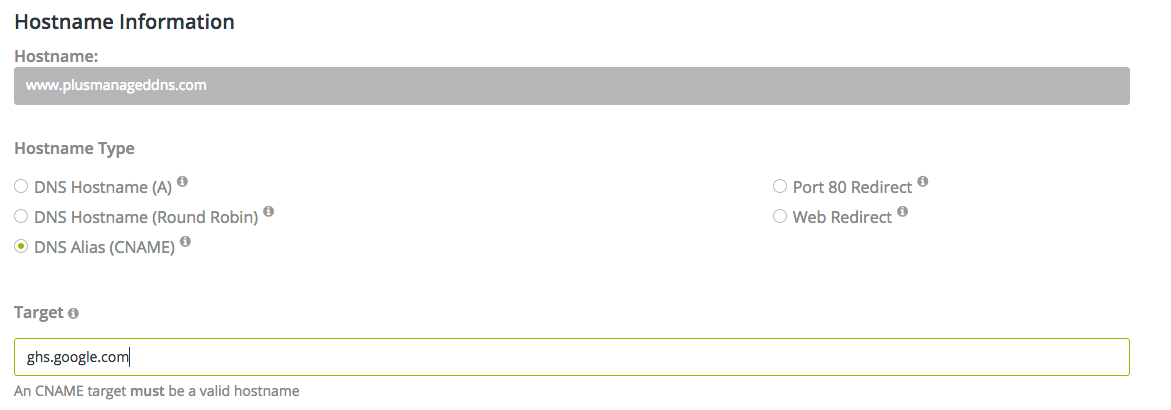
Next, login to your No-IP account and click “DNS Records” under “My Services”. Click “Modify” on the hostname you will be using with your Blogger page.

For example, if you are using “www.domain.com” you will want to modify that record. Change the Host Type to “CNAME” and set the target to the target Blogger provided. Below is an example of the CNAME (shown left) and the Target (shown right), along with the record example.
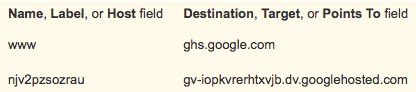

After modifying the records your domain and hostnames should look like the photo below.

Once the records are modified wait at least 5 minutes and then click “Save” again on Blogger.
Congratulations! You can now visit your blog using your personal domain name. You may wish to edit the Blogger settings again and check-mark “Redirect domain.com to www.domain.com.”