This guide works under the assumption that you already have a No-IP account. If you haven’t already set up an account, please start by reading our Getting Started Guide before continuing with this article.
Overview
With the readily available access to cheap broadband connections these days, more and more people want to put that bandwidth to work to access another computer over the Internet. While there are several tools available to do so, one of the more popular offerings is called VNC. A major benefit of VNC is that it’s available for many platforms and certain versions of it are free for personal use. If you’re going to use it commercially, you should make sure to license an appropriate version.
One major obstacle to overcome when trying to connect to a remote machine is that most locations that you want to connect to will only have a dynamic IP address instead of a static IP address. Typically, when you want to access your remote computer over the Internet, you enter the IP address of that computer into your remote access software (VNC for the purposes of this guide). With a dynamic IP address, the IP will be constantly changing and getting into your remote computer from off site could be next to impossible. No-IP’s innovative services can help you overcome this tricky problem.
Quick Example
Let’s say you signed up and configured your No-IP account to use one of our existing domains. Next, you install our No-IP DUC (Dynamic Update Client) software on the machine at the location you want to access. Now you install the VNC Server component on the target machine, and the VNC Viewer on any machine that will be used to connect remotely. The next step is to make sure that your router and any firewalls are set up to allow inbound traffic on ports 5800 and 5900 to the local network (LAN) IP address of the target machine.
Now, whenever you want to access the remote computer over the internet, you just type in the hostname you created, i.e., “myhome.myvnc.com,” into your VNC viewer and you’ll be connected to your remote machine.
In the event you have more than one location that you need to access, you can just create another hostname on our site and install the DUC software and a VNC server at that location as well.
On a side note, if you will be using our service to connect to more than one location, we highly recommend you implement the Sub-Account feature that is included with the Enhanced, Plus, and Pro services.
Step 1: Download the VNC software.
For this article we’re using the VNC software available from Real VNC. Real VNC makes the software available free for personal use; please make sure that you properly license your copy if it’s going to be used in a commercial or business environment.
Go to this page to download the free version of the software: http://www.realvnc.com/products/free/4.1/download.html. Fill out the form and follow their instructions in order to get the software from them.
Step 2: Install the VNC Server application on the target machine.
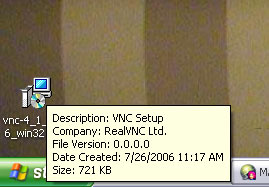
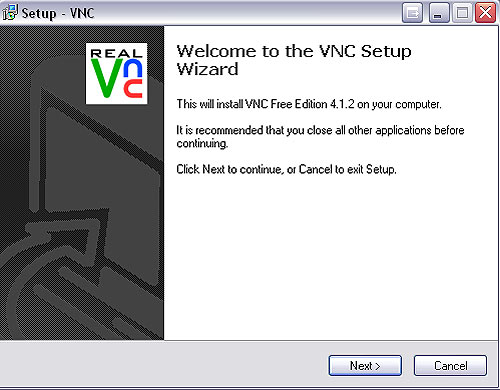
Locate the downloaded executable on your machine and run it. You will have to read and accept the agreement and then click next to move through the install process. Make sure to install the VNC “Server” when prompted.
Step 3: Configure VNC Server to accept inbound connections.
Once you’ve installed the VNC Server software, you need to configure it for incoming connections. This includes specifying a password to use for connections. This is very important, as you’re going to be exposing this machine to connections from the Internet and you need to ensure that you’ve taken adequate precautions to prevent intruders from accessing any information that resides in it.
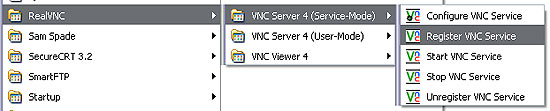
Locate and open the VNC Server application you just installed. If you installed it to the default location, you’ll find it under Start –> All Programs –> Real VNC –> VNC Server as shown below. Since this is the first time that you’re running it, you should open the “Configure VNC Service” program to set up your password.

Go to the Authentication tab, select the VNC Password Authentication option, and click Configure. In the box that pops up type in the password to be used to allow remote access to the machine. Good passwords use a combination of letters (both upper and lower case), numbers and punctuation, but of course it should be something you can remember when trying to connect. Enter the password, click OK, then OK again.

Step 4: Start the VNC Server.
If you set up the VNC Server as a service during the installation, but haven’t yet rebooted the machine, you may have to perform the following steps.
Go to the Real VNC Server folder (Start –> All Programs –> Real VNC –> VNC Server and click on the following: “Register VNC Service” followed by “Start VNC Service.” This will prepare the VNC Server to receive connections. Using it in service mode (as opposed to user mode) ensures that in the event of an unattended reboot of the computer, the VNC service will start automatically.
Step 5: Configure the router and any firewall software to permit inbound connections to the VNC server.
Router and firewall configurations vary tremendously by user. We can’t get into every possible combination of hardware and software within the scope of this article, but you will need to open and forward ports 5800 and 5900 in order to successfully connect to your VNC server. You can check the availability of those ports by going to our page at www.portchecktool.com and testing them with that tool. If you need more information on port forwarding, have a look at the router port forwarding primer on our site or consult the documentation for your router.
Step 6: Install and configure the VNC Viewer on any machine that will be used to initiate the remote connection.
The installation of the VNC Viewer is substantially the same as the server installation in Step 2 of this document. Obviously you would choose to install the Viewer instead of (or in addition to) the Server component. It’s pretty self explanatory but you can refer to the steps above if need be.
Step 7: Open the VNC viewer and connect to the remote machine using the host or domain name you created in your No-IP account.
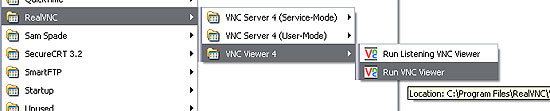
Now you’re going to open a connection to your remote machine using the VNC Viewer. Open the Viewer software which should be in Start –> All Programs –> Real VNC –> VNC Viewer
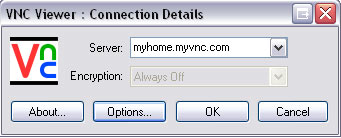
A connection box will pop up asking you the name of the server you wish to connect to; input the name of a host you have created in your No-IP account, then click OK.
Note: Please remember to use your own hostname, not the example we have provided here.
Next, a window should pop up asking you for the password. This is the password you explicitly created earlier. Click OK.
Congratulations! Provided you’ve set everything up properly, you should now be presented with the desktop of your remote machine. Depending on how you’ve configured the remote machine, you may see a standard Windows username and password box. In that case you would input the normal logon information used to access that machine as if you were sitting in front of it.
You can learn more about No-IP and Remote Access here.