CNAME Records Basics
CNAME or canonical name records, map your hostname to another hostname.
CNAME records are useful for pointing multiple hostnames to the same place and updating them easily. They are also often used for validating domain ownership.
Here is an example of a CNAME record:
Hostname: www.noip.com Target: noip.com
In the example, the CNAME is “www.noip.com” and it points to “noip.com.” The domains are different but they still go to the same place (The IP address of noip.com) and follow the same DNS rules that are in place.
Please note that No-IP does not support CNAMEs at the root domain level (ANAME or Apex CNAME).
How to add a CNAME Record
Even if you don’t use No-IP to manage your domain records, the same general steps will apply. However, the process may differ slightly.
Step 1: Access Your DNS Records
From your No-IP account, click Managed DNS on the left side menu, then DNS Records. Next, click Add Record which should change the available field. Under Type, select CNAME.
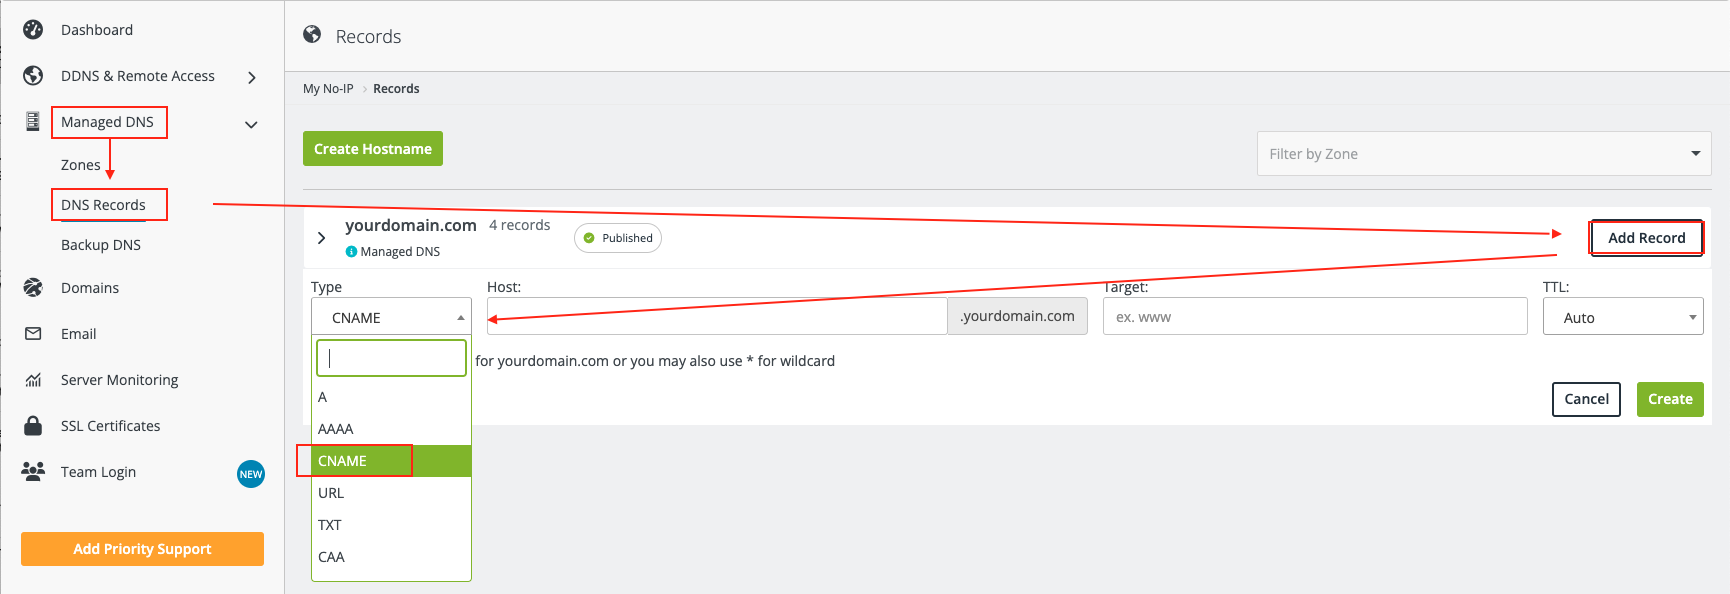
Step 2: Configure Your CNAME Record
Type your desired hostname and enter the target afterwards. The target must be another host or domain name. You can select the desired Time To Live but Auto will place the record at the fastest time available.
Step 3: Add Your CNAME Record
When finished, click the green Create button to create the CNAME record.
Additional Tips for CNAME Records
If the entries under Hostname or Target are long, or begin with an underscore character “_”, you may need to contact support to have the record created.