This guide has been created to assist you with setting up Postfix using No-IP’s Alternate Port SMTP service. This guide will go over everything that should be done to ensure that your Alternate Port SMTP service functions properly. Simply follow the guide to ensure that your settings are correct.
Note: We will be working with Sudo commands. You will need administrator permissions to complete this process.
Please be aware that this guide will not cover how to install Postfix.
Configuring Postfix
Once you have installed Postfix you will need to start configuring the service. The following steps MUST be taken in order to send outbound mail using No-IP’s Alternate Port SMTP service with Postfix.
Once you have completed installing Postfix you will need to modify the “main.cf” file. Simply enter the following command into Terminal and press ‘enter’.
| sudo nano /etc/postfix/main.cf |
Using the arrow keys on your keyboard, press ‘down’ until you see a line saying “myhostname =”. You will need to replace the information after the “=” with the FQDN you used in your Postfix setup wizard when first configuring.
At this time you will also need to configure the “relayhost =” line just below the “myhostname =” line. Input the following after the “=”
| [smtp-auth.no-ip.com]:3325 |
![]()
Next, you will also need to add the following to the bottom of the “main.cf” file. By adding the following information you are enabling authentication, and showing Postfix where to locate your Alternate Port SMTP username and password information. You can copy and paste the following into the Terminal window.
smtp_sasl_auth_enable = yes smtp_sasl_security_options = noanonymous smtp_sasl_password_maps = hash:/etc/postfix/sasl_passwd smtp_use_tls = yes |
It is now time to save your work and continue onto the next step. Located at the bottom of your terminal window you will see the following information,
![]()
If you are using a standard keyboard simply hold down “Ctrl+X”, then press “Y”, and finish by pressing “Enter”.
You are now finished configuring the “main.cf” file.
Configuring your OUTBOUND SMTP Usernames and Passwords
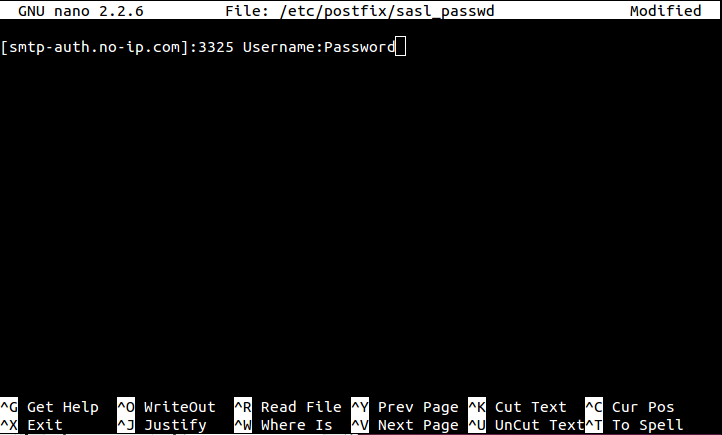
Next, you will need to create a database file that will host your Alternate Port SMTP Username and Password. Follow the steps below to create the database file needed.
Within Terminal enter the following command. By running this command you are creating a new text document that you can edit within your Terminal window.
| sudo nano /etc/postfix/sasl_passwd |
Next, within your Terminal window you will need to type in the following information. Replace “username” and “password” with your Alternate Port SMTP credentials that can be located within your No-IP account under your “mail” tab.
| [smtp-auth.no-ip.com]:3325 example.com@noip-smtp:YourSMTPPassowrd |
As shown above, save this information like you did during configuration.
If you are using a standard keyboard simply hold down “Ctrl+X”, then press “Y”, and finish by pressing “Enter”.
Now, enter the following command into your Terminal window.
| sudo postmap /etc/postfix/sasl_passwd |
If everything went well you will be able to locate your /etc/postfix file and see a file named “sasl_passwd.db”.
Securing your “sasl_passwd” and “sasl_passwd.db” files.
When creating the files above you also created files that showcase the information in plain text. For security purposes it is highly recommended that you change their permissions so that only the root user can read or write to the files. To do so, Copy and Paste the following commands into your Terminal window.
sudo chown root:root /etc/postfix/sasl_passwd /etc/postfix/sasl_passwd.db |
sudo chmod 0600 /etc/postfix/sasl_passwd /etc/postfix/sasl_passwd.db |
Testing your OUTBOUND service.
It is now time to test your settings and make sure you can send outbound mail to yourself. It is recommended to send to an email address that you know is set up correctly.
Using a Terminal window enter the following commands, making sure to press ‘enter’ after each line.
sendmail recipient@elsewhere.com From: you@example.com Subject: Test mail This is a test email . |
If everything has been set up properly you should receive the test email you have just issued using your Terminal window.
If you have any questions or comments about this guide please contact our Support Department via Ticket or simply give us a call at 1.775.853.1883.