By enabling DDNS, Synology devices can be remotely accessed even if your IP address changes. This provides a reliable, convenient way to manage your Synology device from anywhere in the world.
Below is a step by step guide on how to enable Dynamic DNS with No-IP in a Synology Device.
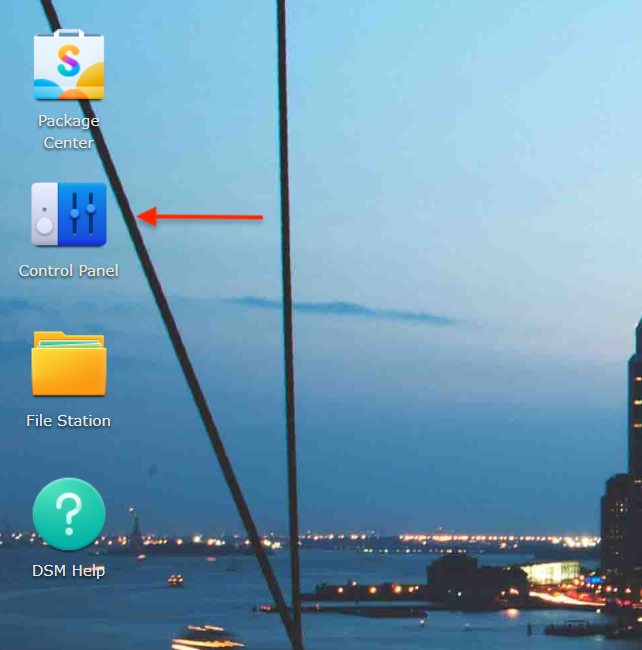
Step 1: Open the Synology Control Panel
On your Synology device Dashboard click “Control Panel”.
Step 2: Open “External Access”
Locate and click “External Access” under “Connectivity”.

Step 3: Navigate to the “DDNS” Menu
Locate and click “DDNS”

Step 4: Choose Your DDNS Service Provider
Locate No-IP from the drop-down menu showcasing all of the potential Synology DDNS Service Providers and input your No-IP account information.

Step 5: Provide DDNS Account Information
Enter your No-IP Account information (or the information for your provider).
Standard No-IP Account Information
Service Provider: No-IP
Username/Email: Your DDNS Key Username / Email
Password: Your DDNS Key Password
Hostname: all.ddnskey.com
External Address: Leave Blank
Not every device will ask you for a server or server address. The service will still work without issue, if the device does not ask for it.
DDNS Key usernames and passwords are created individually for each hostname or group of hostnames. They are generated from the DNS Records page in your account.

Using all.ddnskey.com may break some Synology file sharing features. Use your No-IP hostname instead if you encounter issues.
Step 6: Click “Ok” to Save Your Settings
Click “Ok” and you’re done setting up DDNS access for your Synology device. Your hostname should have been updated to your network’s external IP address. If you’re setting up a remote connection to your Synology, your next step will be to port forward.
Important Notes for Troubleshooting Your Synology Connection
If you test the connection and if it fails, please remove any special characters from your password in your No-IP account under Account > Account Info > Change Password. Special characters are not accepted by all devices, and may be causing the issue.