What is No-IP Public Tunnels
No-IP Public Tunnels is a remote access method that can bypass CGNAT, double nat, and inaccessible routing devices and requirements like port forwarding and public IP addresses. It is a secure, easy, and reliable way to remotely access all kinds of networks and devices.
In this article you will learn about:
- How public tunnels work and how they can be used for remote access without port forwarding.
- How to get access to No-IP’s new Public Tunnels.
- How to install and configure a public tunnel
How Do Public Tunnels Work?
Public Tunnels establish a connection from the inside out.
Our No-IP client creates an outbound connection with a dedicated server that brokers a direct connection between the connecting device (via a hostname) and the remote network. Since the connection starts from inside the network, it bypasses port forwarding, firewalls, and doesn’t require a public IP address.
How to Get Access to No-IP Public Tunnels
No-IP Public Tunnels is accessible to everyone with an Enhanced or Pro Dynamic DNS plan. Tunnels can only be set up using No-IP hostnames. Support for custom domains is on the way!
Tunnel Prerequisites
Public Tunnels require our new No-IP client to be installed and running. Older and third-party clients do not support tunnel functionality.
To install the new No-IP client, follow our official installation guide.
How to Set Up a Tunnel
Setting up a tunnel is easy and the entire configuration is done from your No-IP account.
- First, navigate to the Tunnels page and click Add a Tunnel
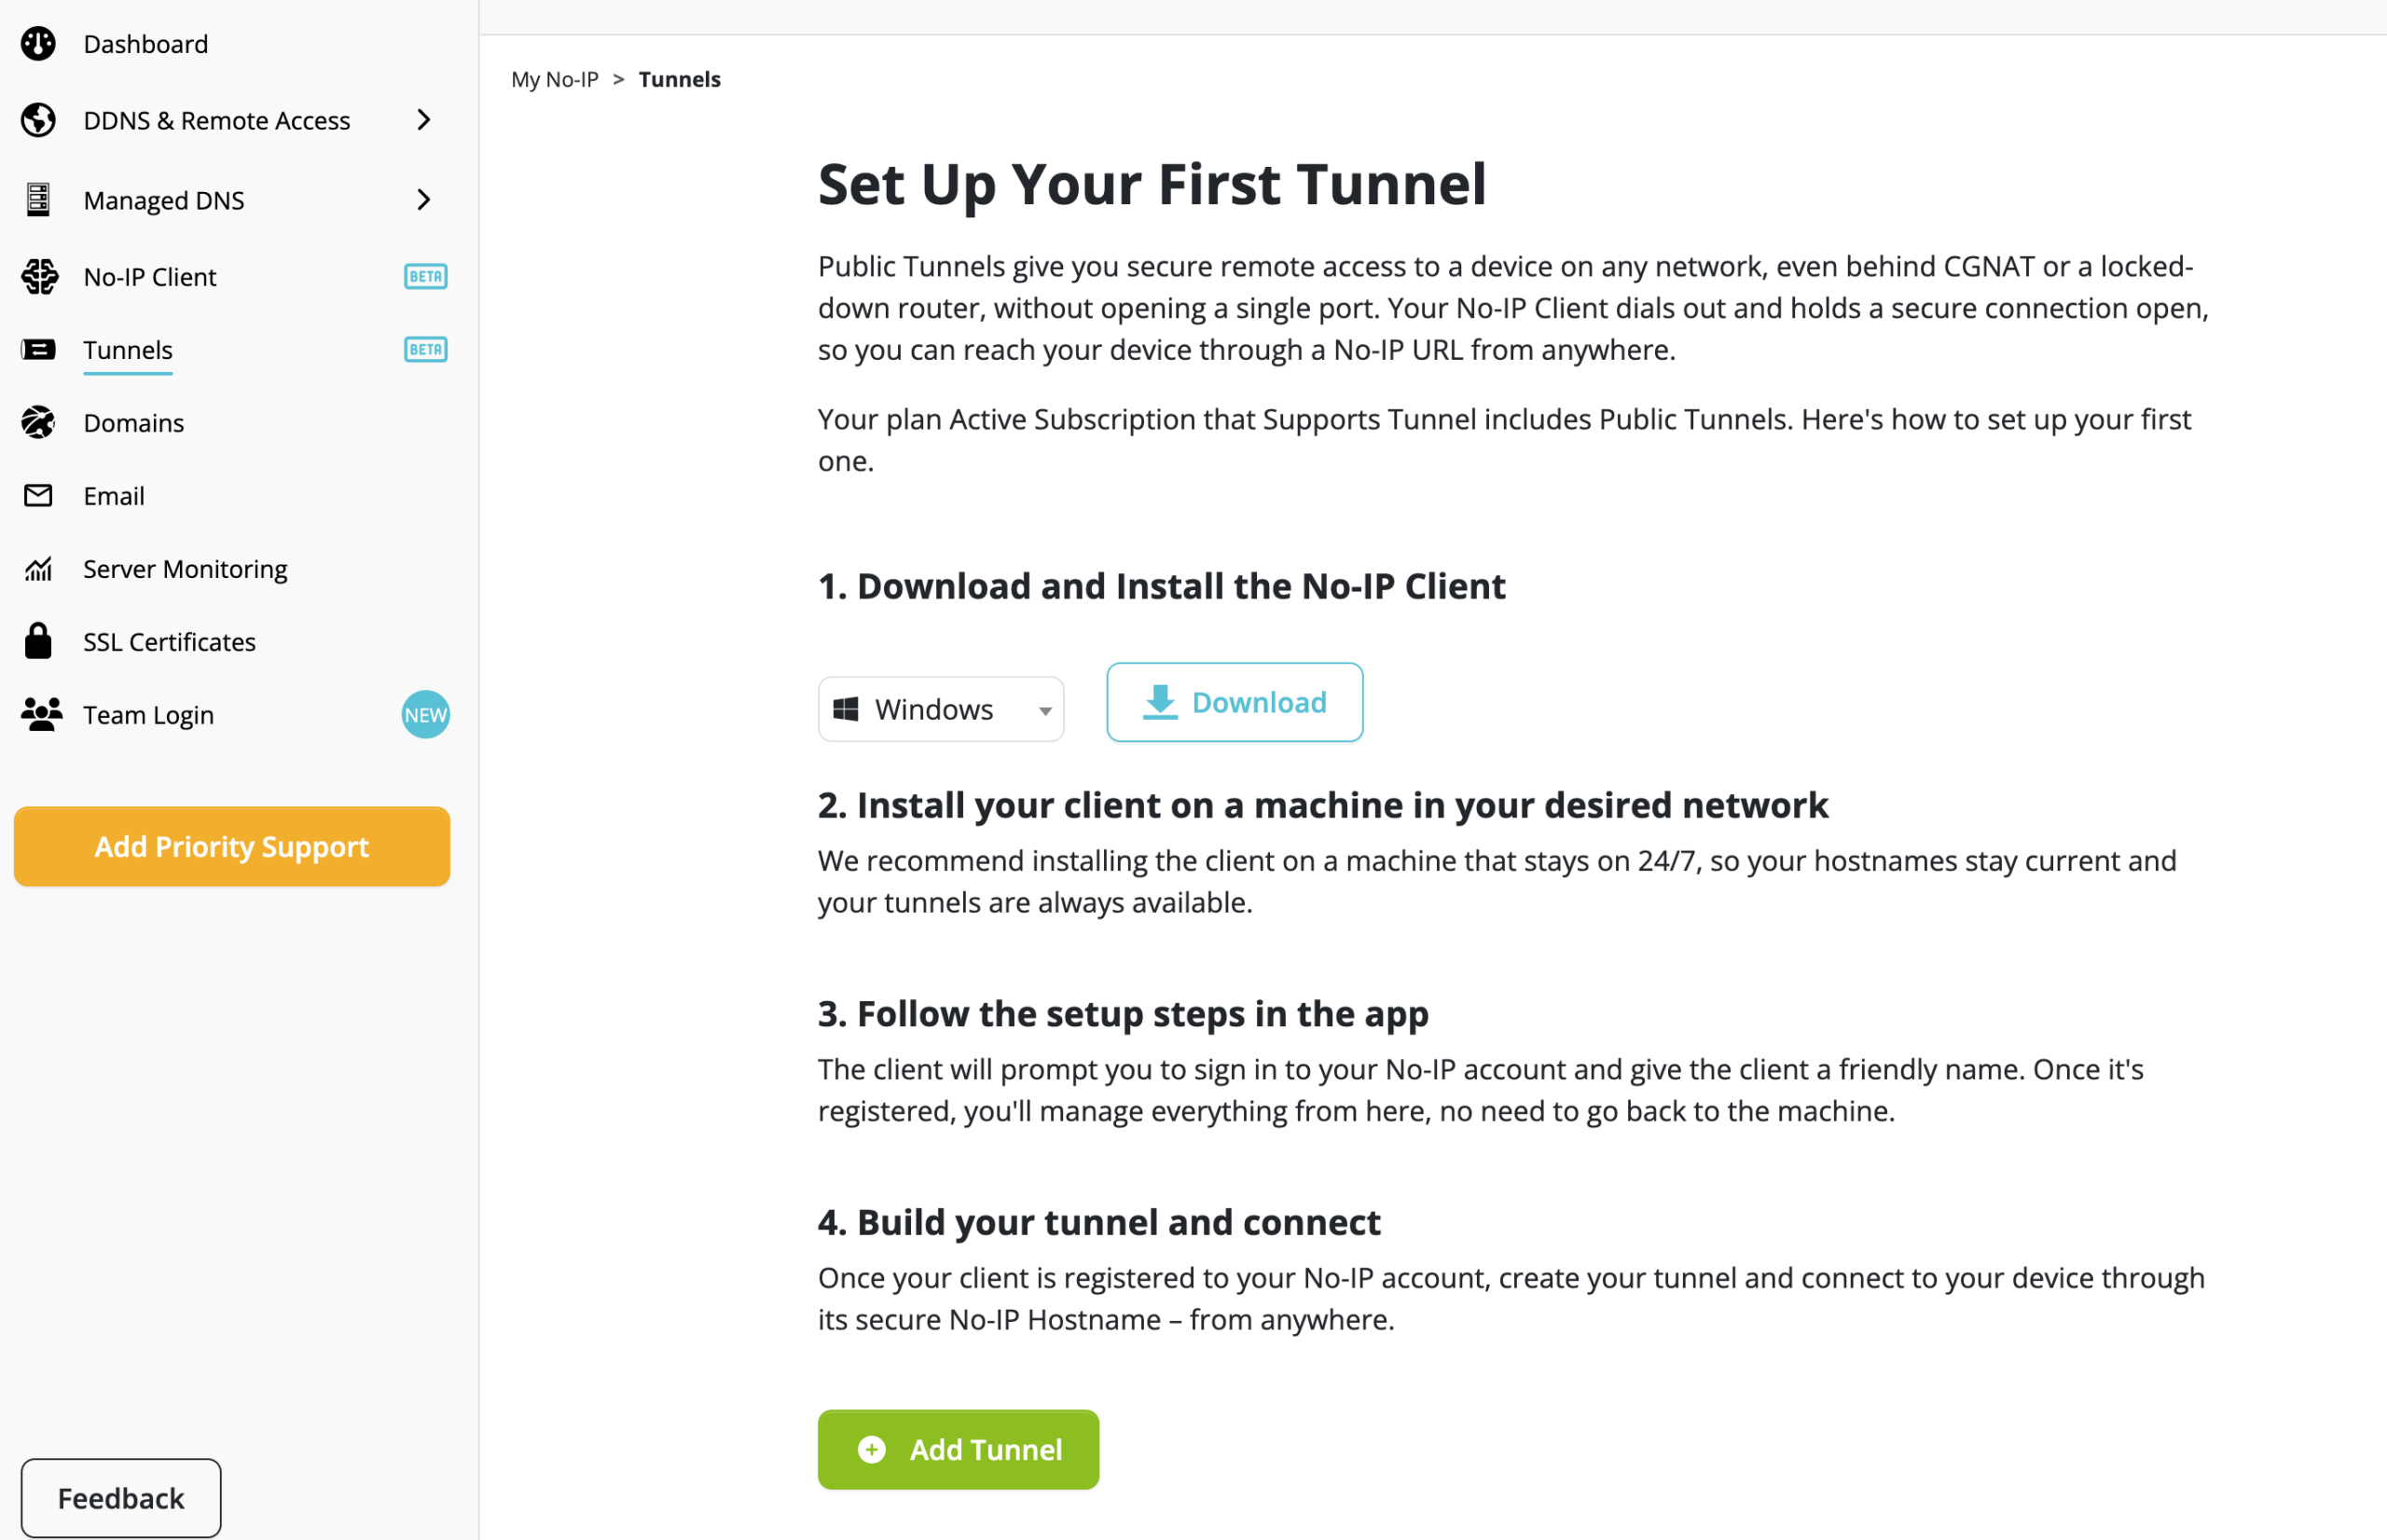
- In the following page, enter all the necessary information:
- Tunnel Name: A friendly name to help you remember what the tunnel connects to.
- Client: The No-IP Client that we set up and is running at the network.
- LAN Address: The local IP address of the device you are trying to connect to, you can append a port number if the service you are connecting to is listening on a specific port e.g. 192.168.1.214:8000
- Hostname: You can either select an existing hostname or create a new one for the tunnel, the hostname is what you or others will use to actually connect to the device.
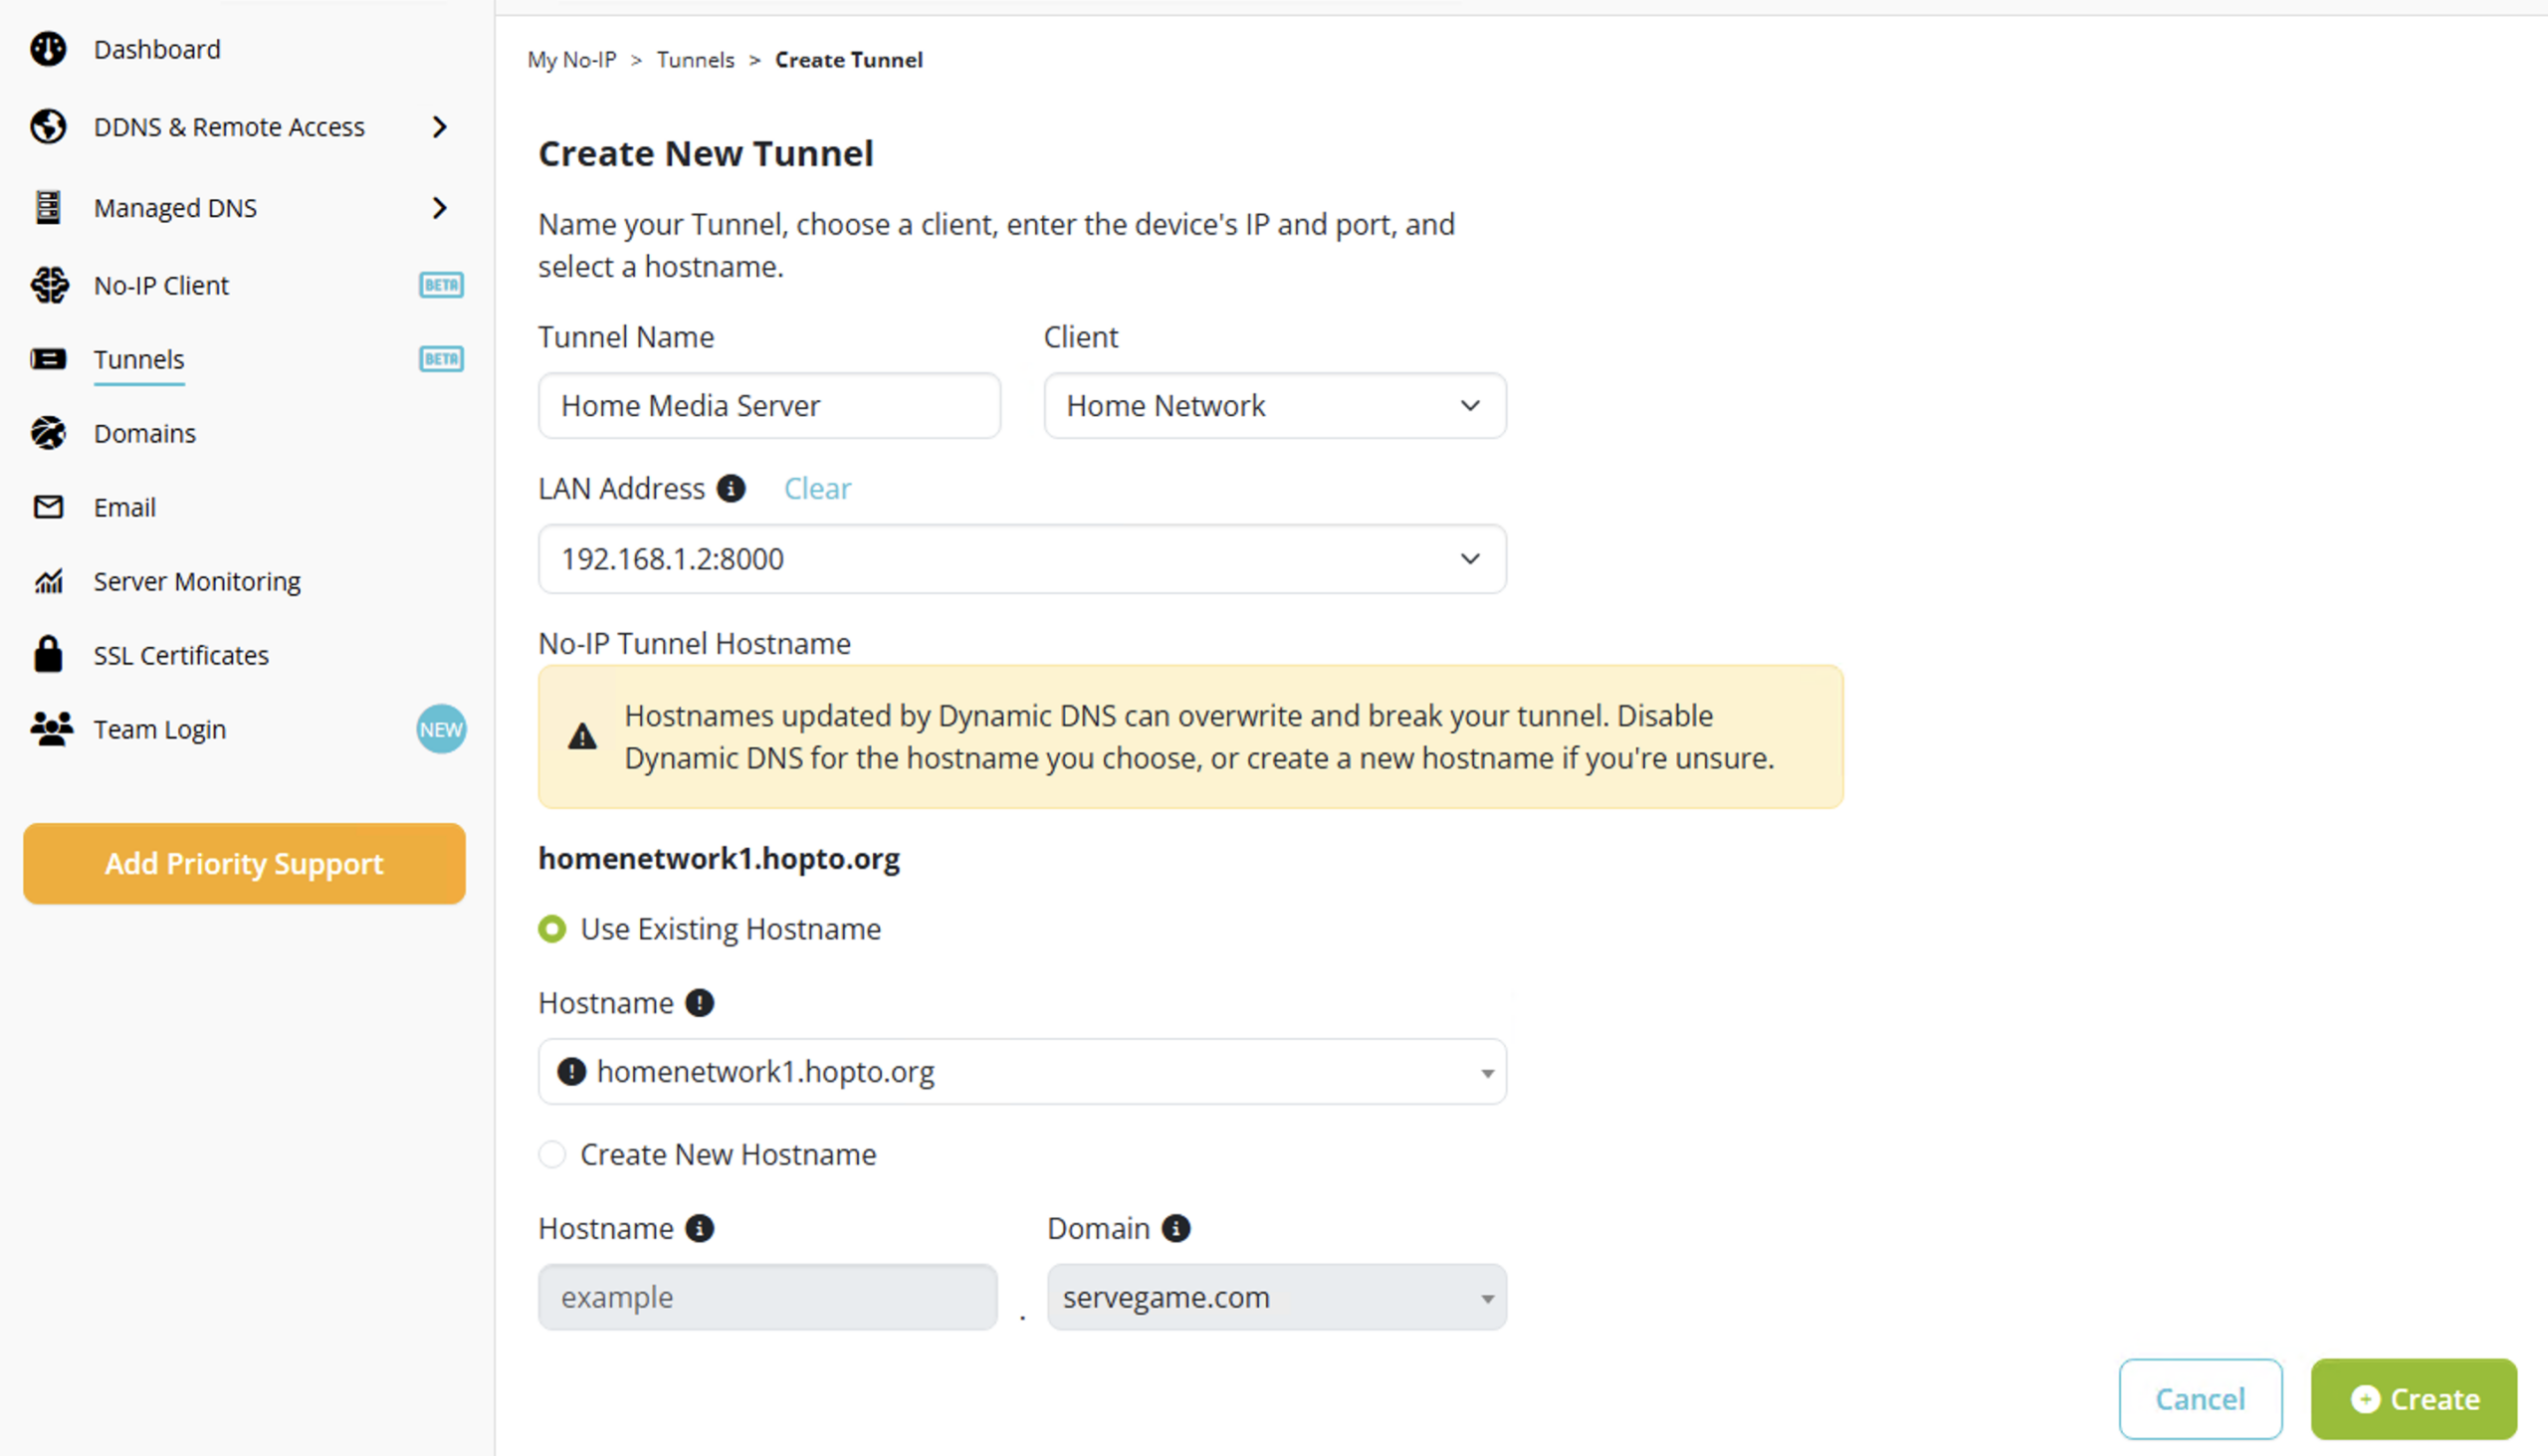
- Lastly, click Create and test it by entering the hostname in your browser, application, or by clicking Connect.
Whether you’re using it at home to connect to your camera system or an MSP looking for scalable remote access, No-IP Public Tunnels makes it easy to set up remote access. In short, tunnels requires no Port forwarding, no public IP address, no fiddling with router settings—simply install the client, and select your hostname.
If you need further help or have any questions, don’t hesitate to contact our support team.