
Article Summary
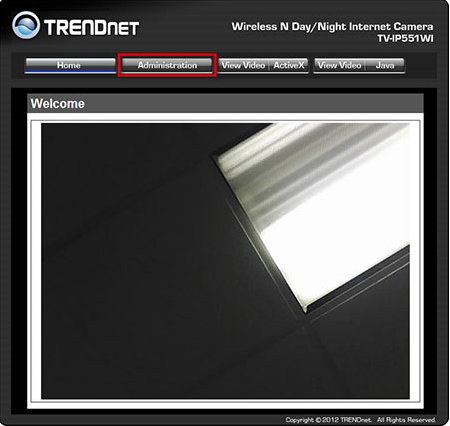
- Log in to your Trendnet camera using its local IP address and click 'Administration'.
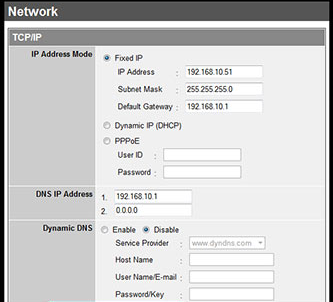
- Click 'Configuration', then 'Network', and click 'Enable' in the Dynamic DNS section.
- Select No-IP from the 'Service Provider' drop down.
- Enter 'all.ddnskey.com' as the Host name, plus your DDNS Key username or email and DDNS Key password.
- Click 'Save' at the bottom of the page so the camera sends No-IP updates when its IP changes.
This guide will help you setup and configure Dynamic DNS within your Trendnet Camera. Using the integrated Dynamic DNS in your camera means that you don’t have to keep your computer running all the time on your network in order to access your camera remotely.
-
Login to your Trendnet camera using the local IP address.
-
Click “Administration.”
 Click “Configuration” and then “Network” in the left-hand navigation bar.

-
Click“Enable” in the Dynamic DNS section and then select No-IP from the “Service Provider” drop down.

-
Input the following information:
- Host name: all.ddnskey.com
- Username/E-mail: Your DDNS Key Username / Email
- Password/Key: Your DDNS Key Password
-
Click “Save” at the bottom of the page. Congratulations, your Trendnet camera will now send No-IP updates whenever the IP address changes. You can learn more about using No-IP and Cameras here.